Apparently I am crazy to draw with these outdated tools but I like the hand-drawn look and feel. I don't think that I can do a streaming any time soon, but I can share how I draw the illustrations old-school in MS Paint and shade in GIMP. I finished illustrating my special forces subs book (see link below - check it out on Amazon) so I have a bit of time to indulge on other types of sub illustration.
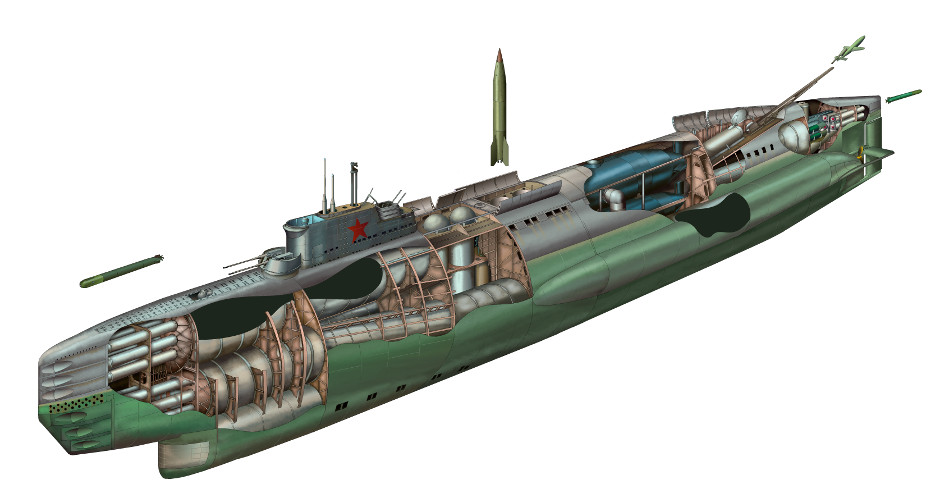
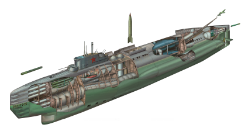
The end result will be the Soviet P-2 super-sub design which incorporated ballistic missiles, cruise missiles and midget subs. More here: Stalin's Super Sub, Project P-2

Original artwork - CLICK for HIGH-RESOLUTION (4000px) image.
The World's ONLY Guide to
Narco Submarines
10 years of research, analyzing over 160 incidents, condensed into a handy guide. This unique book systematically breaks down the types and families. With detailed taxonomy, recognition 3-views, profiles and photos. Available on Amazon
To start I create a MASSIVE canvas (e.g. 7000 px wide) so that I can draw it big and then scale it down to just 4000 px or thereabouts. That still seems massive compared to most of what's on the internet but it'll look crisper when scaled down. I paste in photos and schematics or other reference notes around the edges of where I'm drawing. I then sketch the overall submarine. This step is important and takes 1-2 hours with lots of rework to get it looking right.
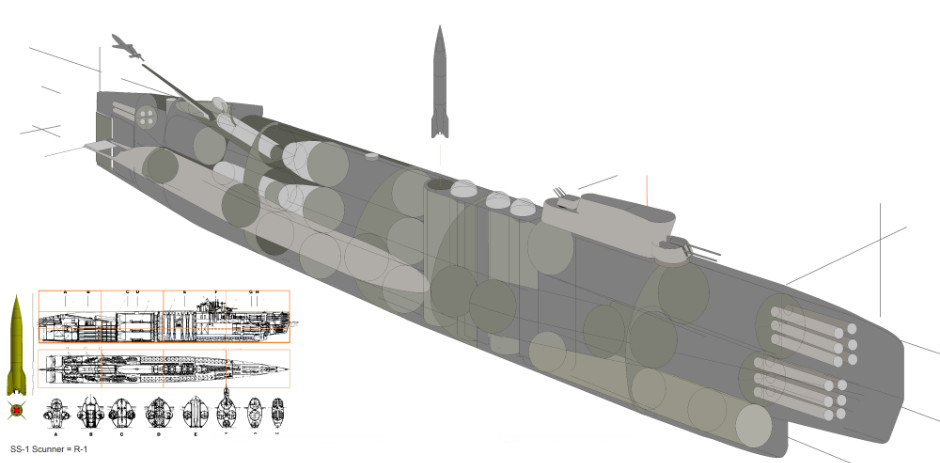
CLICK for HIGH-RESOLUTION (4000px) image. note that real image is about twice the size and saved as PNG
Now I am ready to start fleshing it out. I generally start at one end and work from there but you can draw in any order. I have already decided in my head which bits will be cut away. Generally the end of the submarine nearest the viewer needs to be in more detail than the other end.
Get The essential guide to World Submarines
This Covert Shores Recognition Guide Covers over 80 classes of submarines including all types currently in service with World Navies.Check it out on Amazon
Zooming in, I get to work adding the details. Note how rough the underlying construction lines are. I have filled them in gray so that any pixels I miss with my over-sketching will blend into the background and not stand out. I use the polygon tool with a dark near-black outline and gray fill (set as background color). Note that I do not use black, but a wide range of near-blacks. MS Paint's fill tool only fills the exact same color so using a range of near-same colors allows you to use the fill function to erase errors without impacting other parts of the drawing. If you don't get what I mean, draw two overlapping circles in different dark grays - then fill one with one of those two colors. Next fill that same circle with the background color, and you will find that one of the circles disappears but the other does not. This is often easier tan using the Eraser tool.
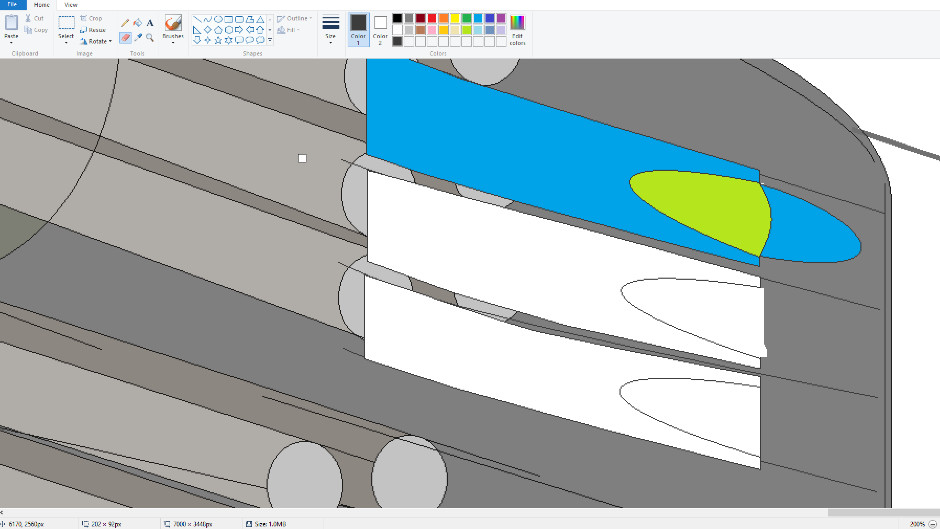
I then fill the polygons in bright colors. I tend to group items that are not physically touching but that will be similar/same colors in the final render with the same color. That makes it easier to navigate the unfinished image while zoomed in. A bit like painting by numbers
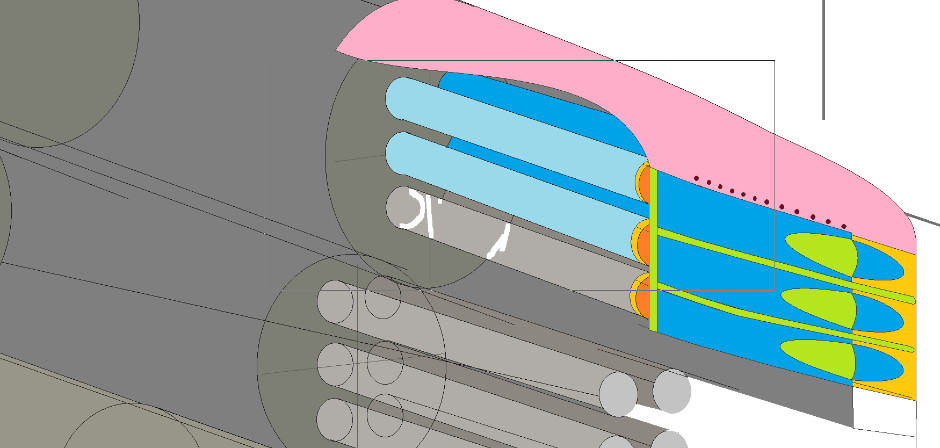
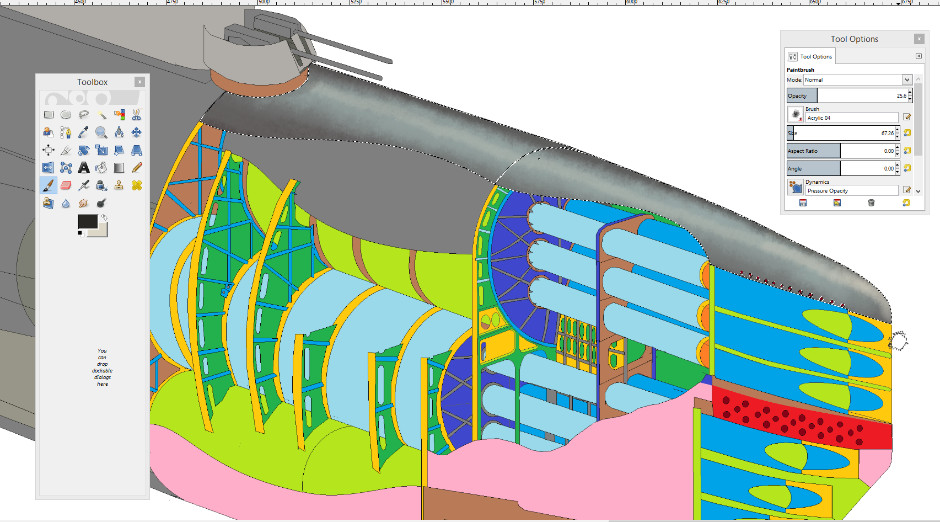
Three hours later and I have a sizeable chunk of the illustration constructed. The little struts on the outer hull bulkheads and frames took ages and a lot of googling of submarine scrapping and construction images. They are not exact, but a fair representation.
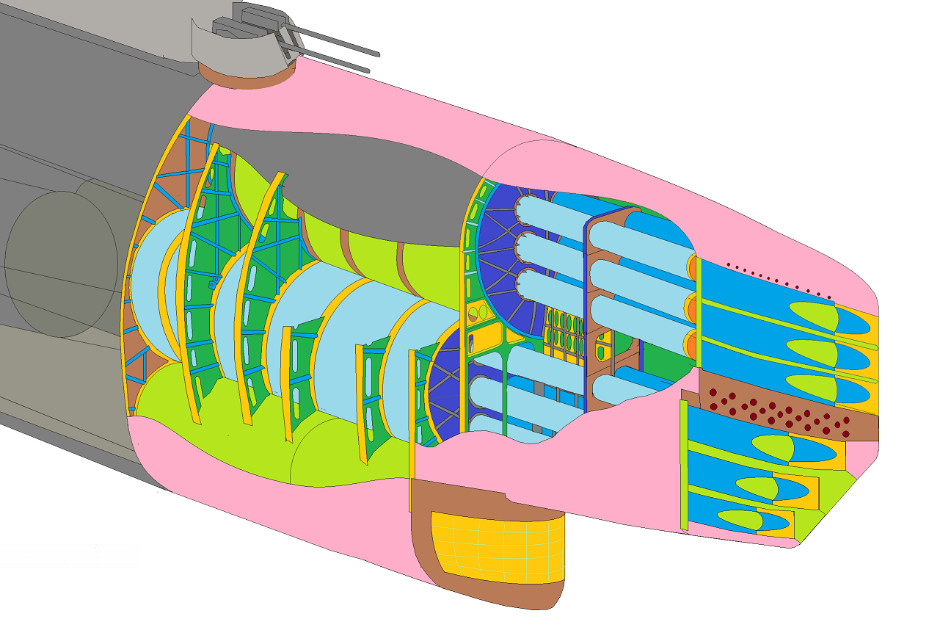
I am now ready to start rendering in GIMP. I use GIMP because it's good and free, but I prefer PAINT for the drawing.
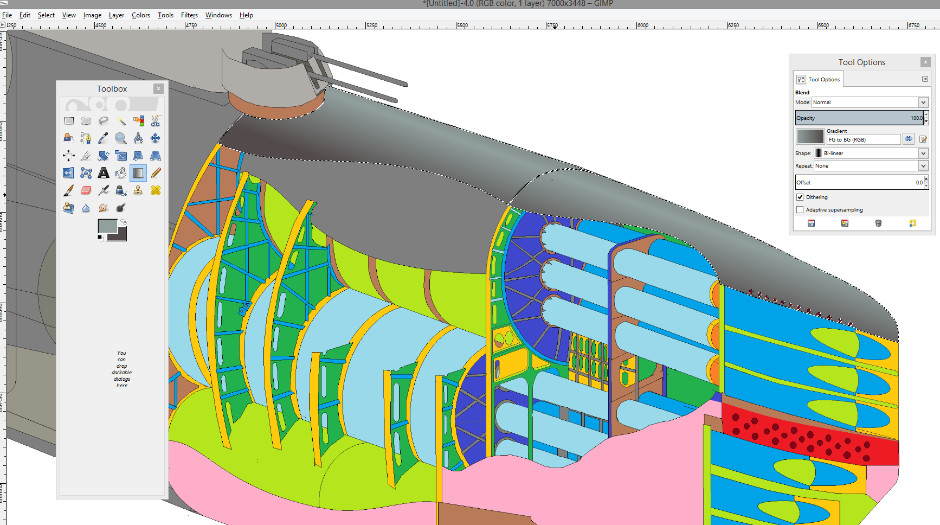
In GIMP I simply select the an area and use gradient fills to form a background shading. I mostly use Bi-Linear gradients but consider any of the options.
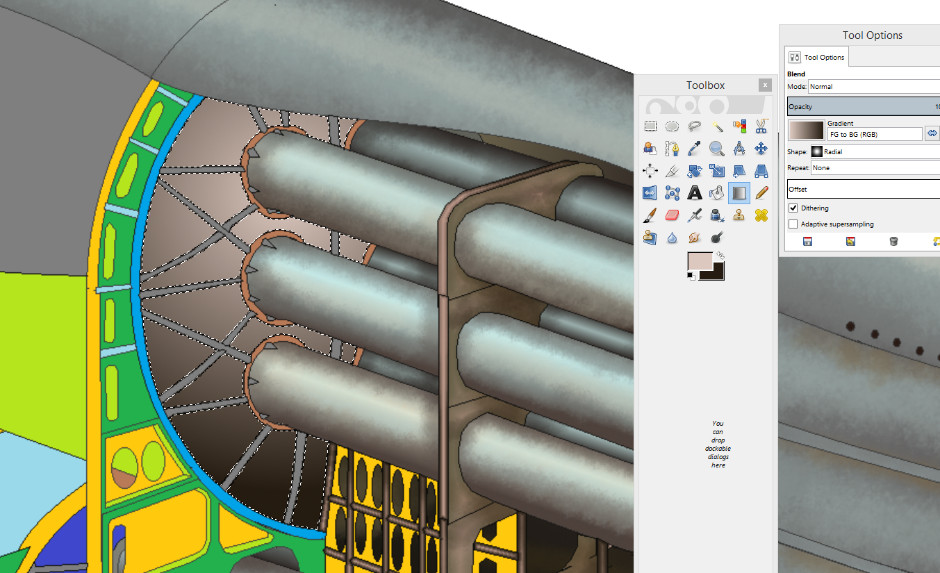
I then use the brushes to give it a more painted feeling and add other colors into the mix. Note that i am shading at about 30% opacity. The colors I use may not be what you'd expect - think in tones more than base colors. E.g. gray is often a mix of blues, greens and browns or even mauve. Here I use a radial gradient fill to give a curved feel to the torpedo room bulkhead:
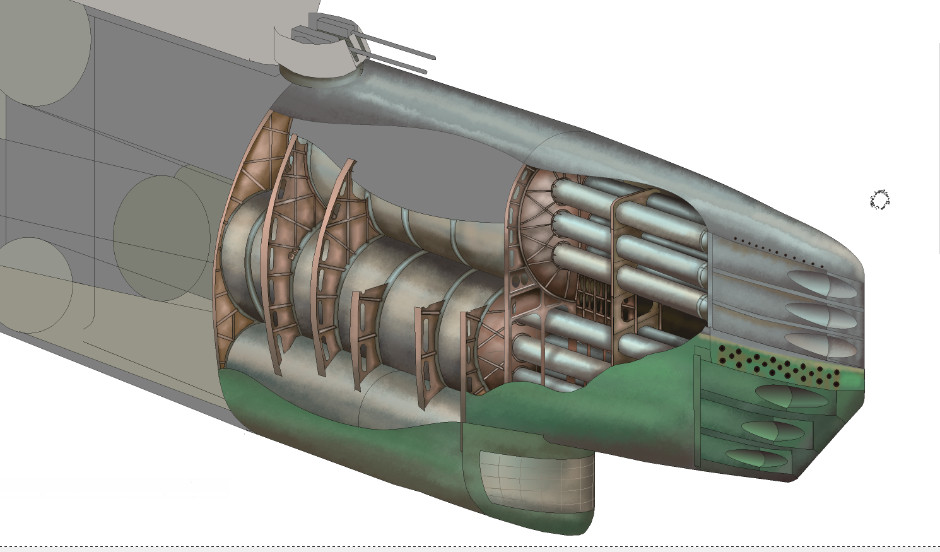
Four hours in and I have the first major chunk done. The GIMP bit is much quicker than the drawing in PAINT.
The ultimate book of Special Forces subs Covert Shores 2nd Edition is the ONLY world history of naval Special Forces, their missions and their specialist vehicles. SEALs, SBS, COMSUBIN, Sh-13, Spetsnaz, Kampfschwimmers, Commando Hubert, 4RR and many more.
Check it out on Amazon
Another four hours and it's starting to look like the submarine. I switched it left-right in order to show certain details on the port (left) side of the sub:
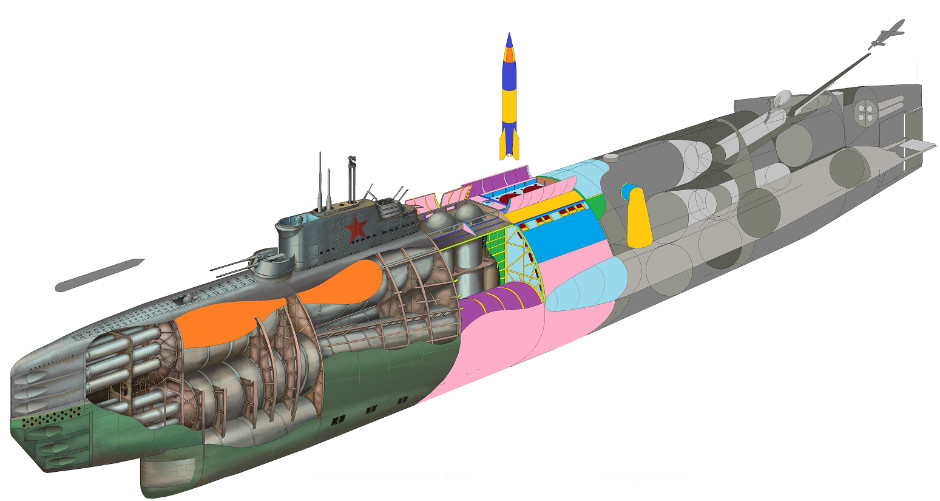
Fast forward to about fifteen hours of drawing and we have an almost finished piece. The dark gray holes are where the interior detail will go.
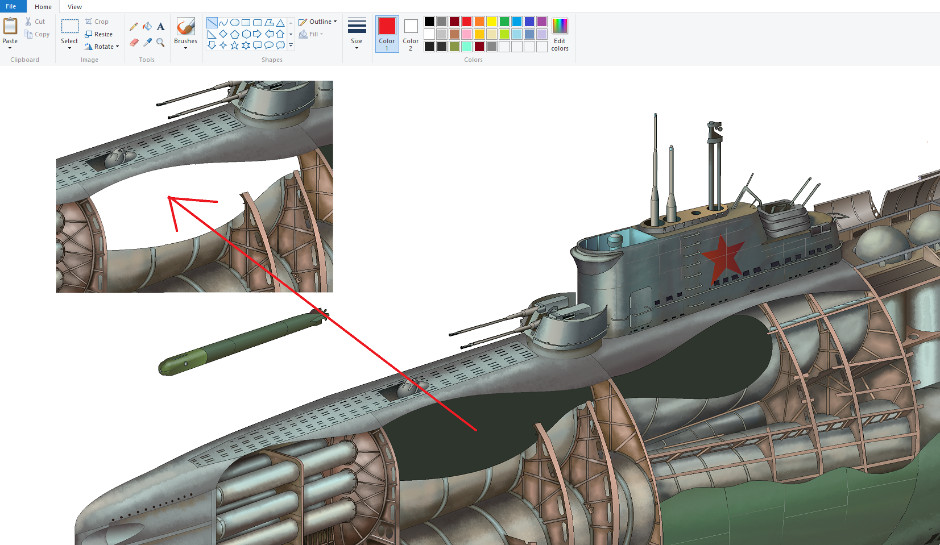
It's now that PAINT comes into its own; the way it treats transparency is great for this type of thing. I copy the area around the hole into a spare piece of canvas so that I will be able to paste it back later.
The sketching to fill the holes can be sloppy because I'll paste the outside back over it when I'm done, giving it clean edges:
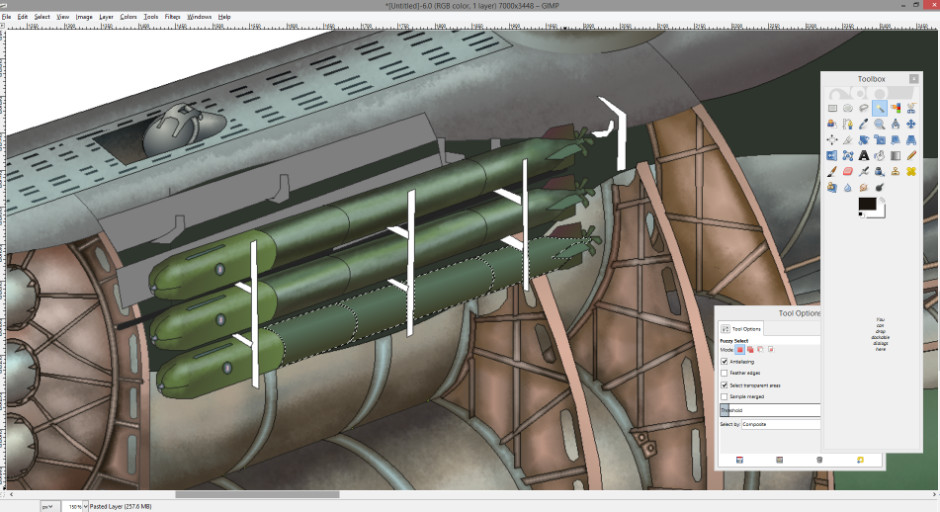
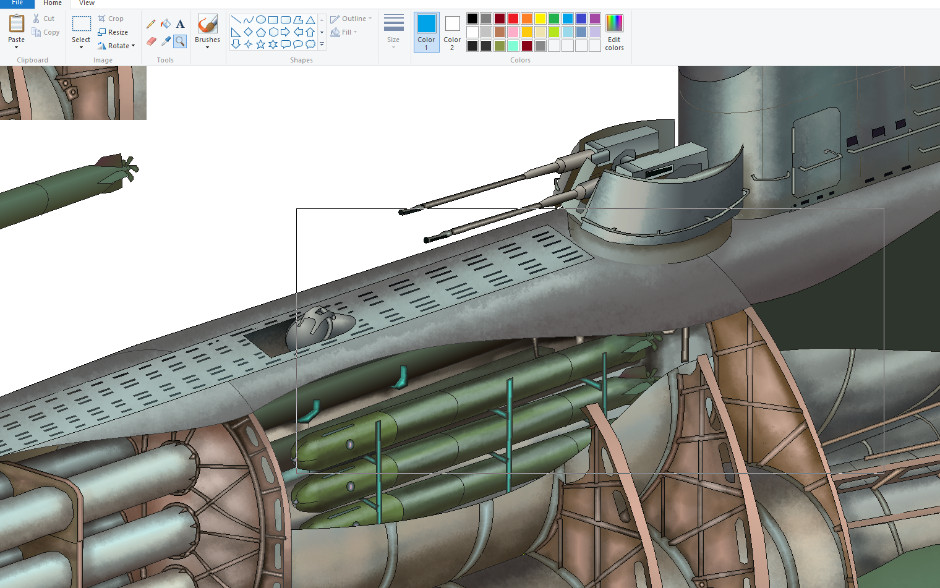
And that, is how to draw a cutaway in MS Paint + GIMP. From here on it was just repeat, polish, adjust the image size and contrast, and export from GIMP as a jpeg.
Related articles (Full index of popular Covert Shores articles)

 Stalin's Super Sub, Project P-2. w/Cutaway

 Surcouf Cruiser Submarine w/Cutaway

 SMX-31 future submarine concept ('The Electric') w/Cutaway

 Project 885 'YASEN' (Severodvinsk Class) SSGN. w/Cutaway

 Type-XXIXH stealth U-Boat. w/Cutaway

 A-26 Blekinge Class attack submarine. w/Cutaway

 Sturgeon Class SSN. w/Cutaway

 Project 955A 'BOREI-A' Ballistic Missile Submarine. w/Cutaway

 Project 705 'ALFA' class attack submarine. w/Cutaway

 Project 673 Advanced Submarine design. w/Cutaway

 USS Parche spy sub par-excellence. w/Cutaway

 Project 09852 Belgorod Special Mission submarine (spy sub). w/Cutaway

 TYPHOON Class SSBN. w/Cutaway

 Piranha Class (LOSOS) midget sub. w/Cutaway

 Russian Losharik spy sub

 Russian Seismic Survey sub

 USS Halibut. w/Cutaway


